Configuration: Camera
Here you adjust the operation of the various cameras.
Camera | PoE | OSD Settings | Image settings | Privacy Mask
Camera
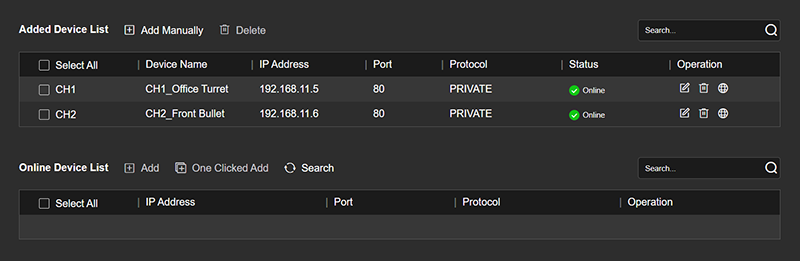
This shows all cameras currently connected or available to the NVR.
The Added Device List shows cameras assigned to a channel. Click  to go to the camera's IP address. You can also edit
  or delete
  cameras that have been added via the network. You cannot edit cameras that are attached directly to the NVR ports.
The Online Device List shows cameras available over the network. Select any available camera(s) and click either Add to add manually, or One-Click Add to connect using defaults. Click Search to refresh the list of devices available.
PoE
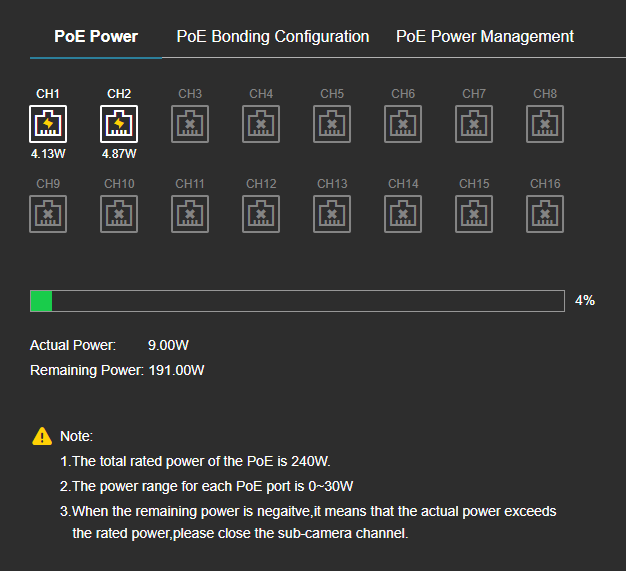
Here you control the power supplied to the cameras.
PoE Power
This informational pane shows actual power consumption as compared to the NVR's capacity.
PoE Bonding Configuration
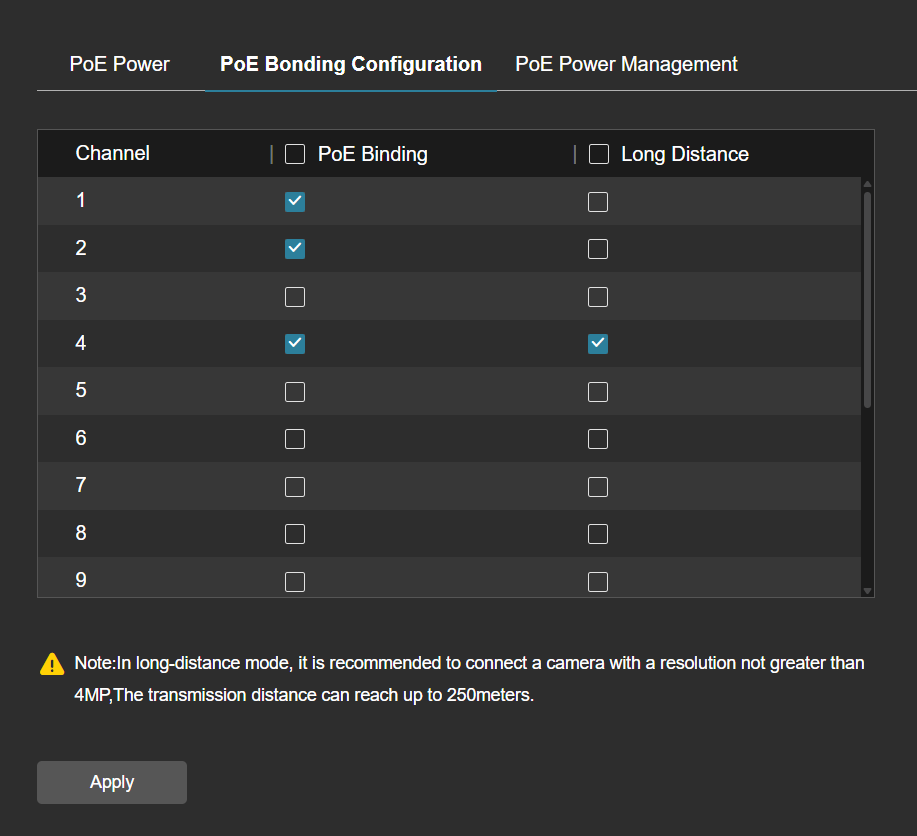
PoE Binding is required to view a camera:
-
attached to a PoE port on the NVR.
-
on a switch (through the NVR or through its URL or streaming).
-
attached to a port online (through its URL, the NVR's URL, or streaming).
-
through OvrC.
Enable Long Distance for all cameras with cable runs over 100m.
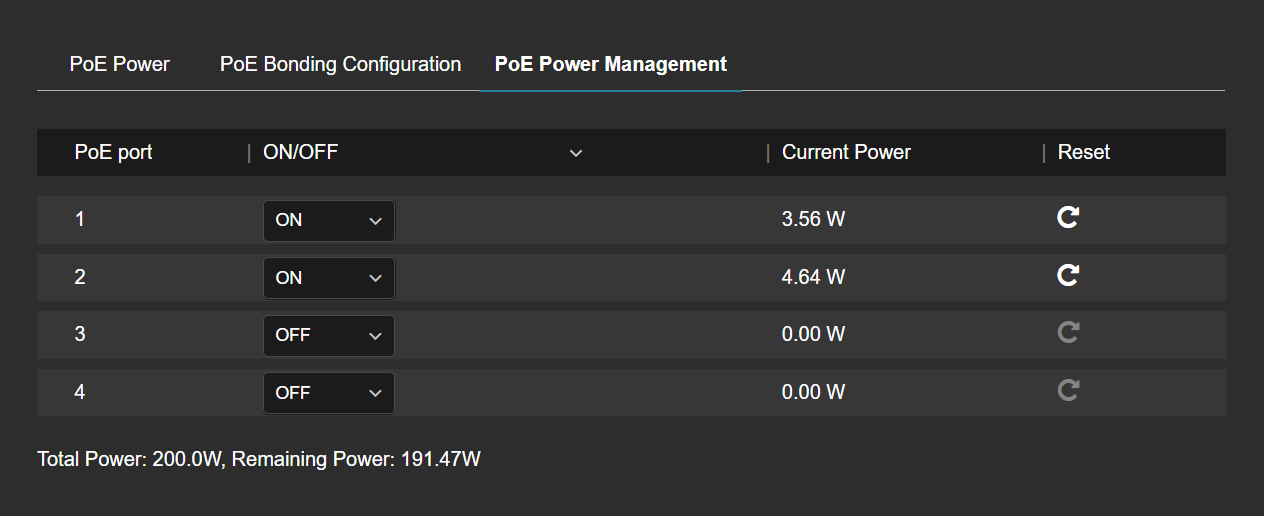
PoE Power Management
This shows the current status of PoE and draw. Switch PoE off for all cameras connected to external power. Click  to restart the attached camera.
Pro Tip: The first time you visit this page, it may incorrectly display all ports as OFF. Change one port to ON to fix this issue.
OSD Settings
Here you configure the additional information shown on the surveillance feed: the camera name and/or system time.
The camera name displays throughout the NVR interface, but does not upload to OvrC. You can only edit the name if Display Name is enabled.
Click Clear All to remove all masks.
Click Apply to save all changes you've made.
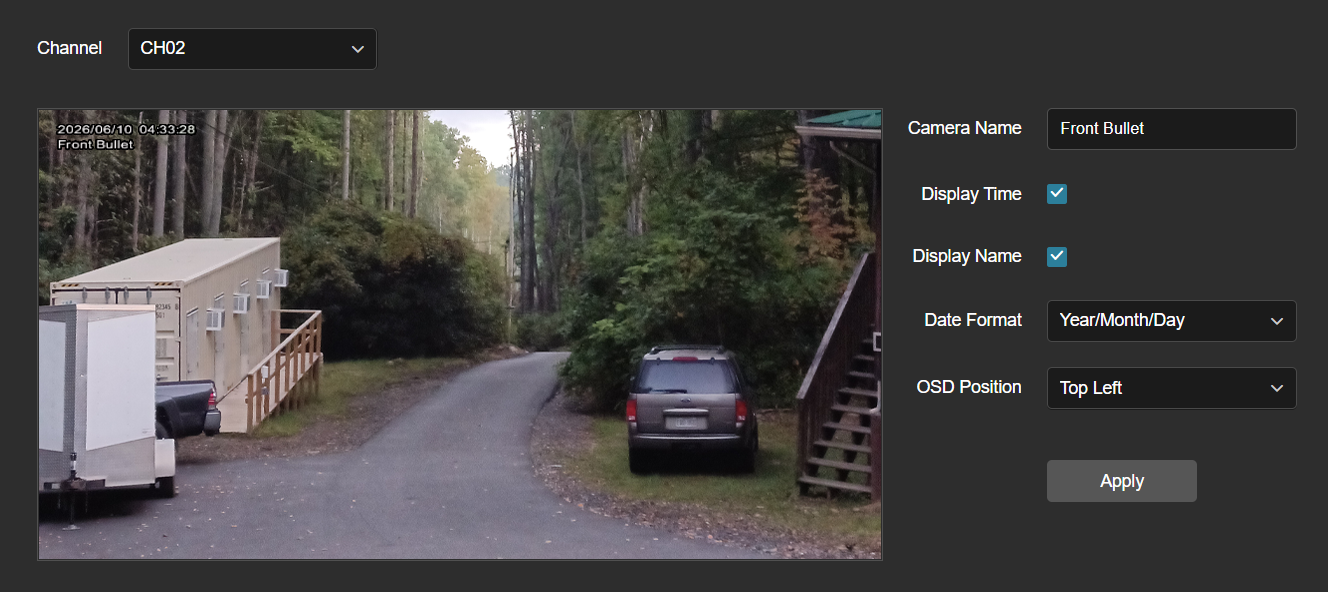
Image settings
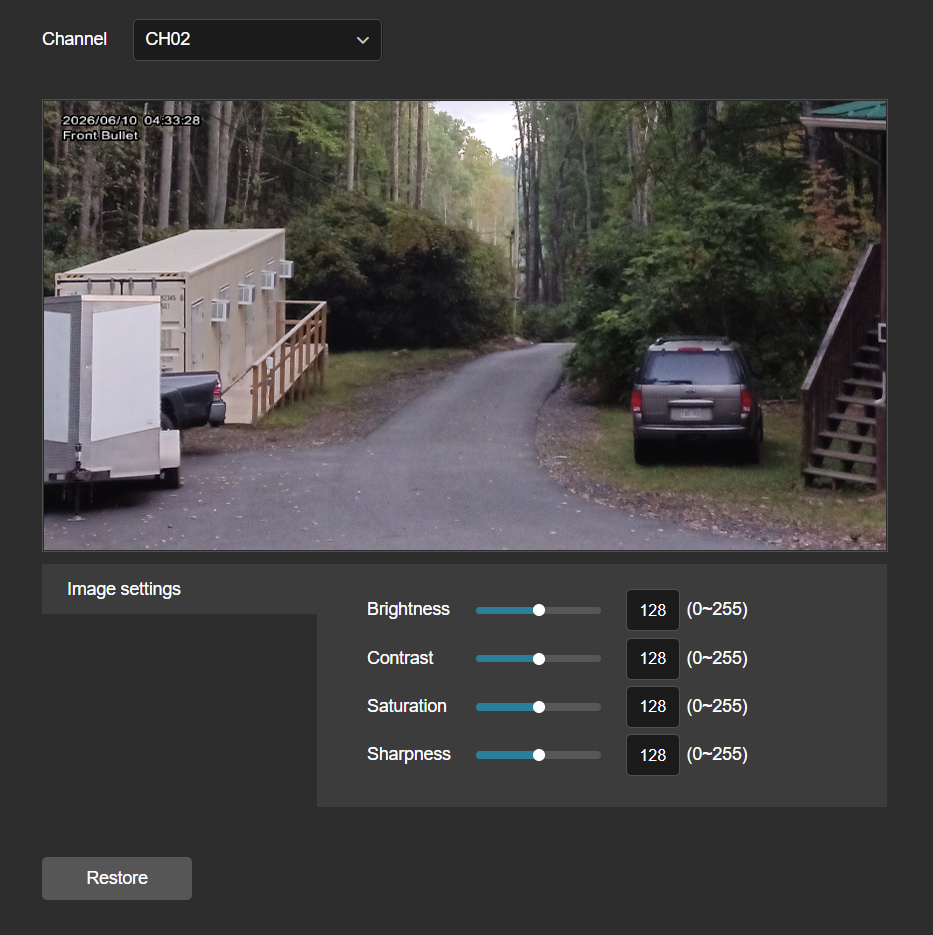
Here you adjust the image settings to get the best visuals. Use the dropdown at top to select the channel to edit.
Use your mouse to move the sliders, or directly enter values in the text boxes to the right.
All image adjustments are saved automatically.
Click Restore to reset all sliders to the midpoint.
Privacy Mask
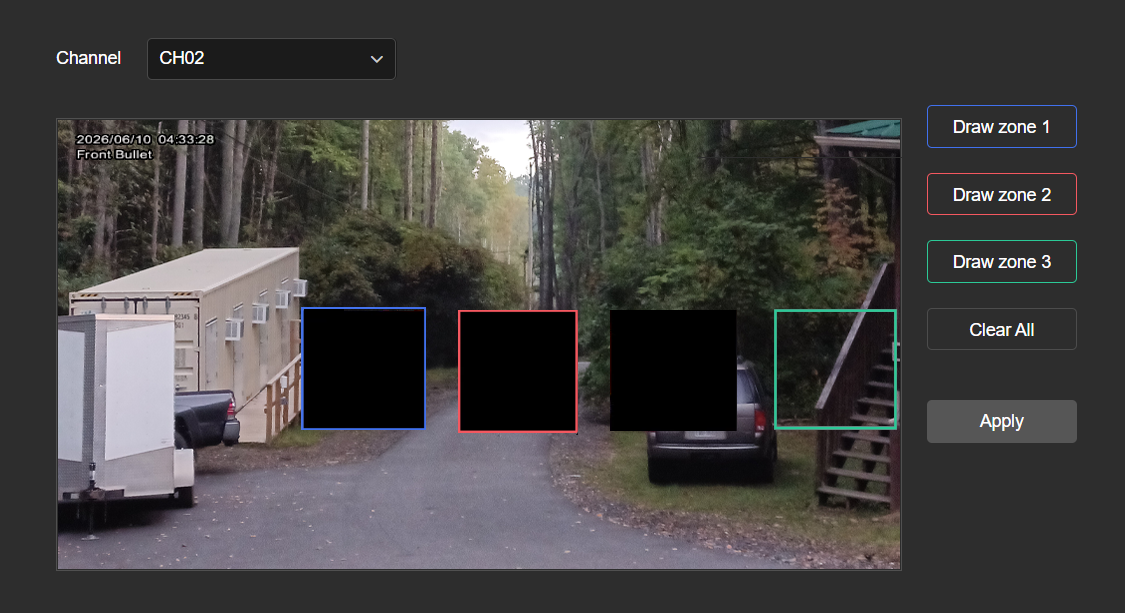
The NVR supports up to three zones. Click and drag to create a zone. Zones are always created in order, and you do not need to click a zone button to create one.
Once a zone is created, click and drag within the square to reposition it. Click Apply to save the privacy masks; the interior of each zone turns black.
Active zones show a colored border. To remove a zone, click the matching Draw zone # button. The colored border vanishes, and you can redraw that zone (as is being done for zone 3 in the illustration). Click Apply, and the old box vanishes and the new block becomes opaque.
Caution: If you click in the image without dragging, it creates a size 0 zone. If you click three times, you will be unable to draw another zone. To solve this problem, click Clear All.